
Serverless in 20 Minutes: Gaming Leaderboard
- The Kalix Team at Lightbend
- 28 July 2022,
- 14 minute read
In this tutorial, we will create a simple gaming leaderboard simulator app based on Spring Boot. We will deploy the code on a serverless platform, so we only have to write the logic without paying much attention to how the data is stored.
But first, let’s introduce our serverless deployment platform: Kalix.
Kalix is a Platform-as-a-Service (PaaS) from Lightbend. It lets developers focus on business logic and boosts their productivity as a result. The platform provides quick deployment and robust resources, both of which boost scalability. Additionally, its pay-as-you-go payment plan grows alongside the business. This is especially advantageous because user requests can spike in some seasons and decline in others.
Now that you know the Kalix basics, let’s get started.
Prerequisites
- An understanding of Java and Java 11 or higher installed on your system.
- Familiarity with gRPC and protobufs. If you do not have this, review the documentation.
- Knowledge of the Maven dependency manager and Maven 3.x or higher on your system. You may use tools such as IntelliJ IDEA, which already includes Maven. It’s easier to run Maven commands from an integrated development environment (IDE) (for example, IntelliJ) than from the terminal.
- Knowledge of Spring.
- Docker 20.10.8 or higher installed on your system.
- The Kalix CLI.
- A Kalix account so you can explore its free features.
You can also view the complete project code at the following public repositories:
Building the App
The Spring app communicates with the Kalix service, which performs storage and retrieval logic. As mentioned, the storage technology details are abstracted—we only have to write the code.
There are several ways of persisting data, one of which is event sourcing. We chose event sourcing for this tutorial because it stores all entity changes in a journal, so you can view the change history, which is important for tracking player progress in a game.
First, let’s create the service.
Creating the Kalix Service
The following Maven archetype command downloads the pom.xml file that we require for adding dependencies and other configurations for our app. In your working directory, open your favorite terminal and run it. As always, be sure to check for the latest Kalix version before starting:
mvn -N -B archetype:generate
-DarchetypeGroupId=io.kalix
-DarchetypeArtifactId=kalix-maven-archetype
-DarchetypeVersion=1.0.2
-DgroupId=com.example
-DartifactId=leaderboard-kalix-services
-Dversion=1.0-SNAPSHOT
-Dpackage=com.example
Make any appropriate changes to the dockerImage, mainClass, name, and artifactId tags. You can rename them, but to avoid errors, we suggest that you keep the names used here.
Next, let’s create two protobuf files. One is for defining our data entities (domain), and the other is for creating services and their invocation commands (API). Run these two commands if you’re using Linux:
mkdir -p ./src/main/proto/spelling/game/api
mkdir -p ./src/main/proto/spelling/game/domain
Or, on Windows, run:
mkdir src/main/proto/spelling/game/api
mkdir src/main/proto/spelling/game/domain
Removing the Sample Files
Kalix applications expose the API as gRPC services, with the API and entities defined in protocol buffer descriptors. The Kalix sample application defines a simple counter API with two descriptor files called src/main/proto/org/example/domain/counter_domain.proto and src/main/proto/org/example/counter_api.proto.
We don’t use these sample files, so delete them. We’ll replace these files with our own.
Modifying the API protobuf Definitions
Create a file called spelling_game_api.proto and add the following:
syntax = "proto3";

package spelling.game.api;

option java_outer_classname = "SpellingGameApi";

import "kalix/annotations.proto";
import "google/api/annotations.proto";
import "google/protobuf/empty.proto";

service LeaderboardDemo {
option (kalix.codegen) = {
  event_sourced_entity: {
    name: "spelling.game.api.GamingLeaderboardEntity"
    entity_type: "leaderboard_entity"
    state: "spelling.game.domain.LeaderBoardState"
    events: "spelling.game.domain.PlayerAdded"
  }
};

rpc NewPlayer(AddPlayer) returns (google.protobuf.Empty) {
  option (google.api.http) = {
    post: "/player/{leaderboard_id}/add"
    body: "*"
  };
}

rpc FetchScores(GetScores) returns (LeaderBoard) {
  option (google.api.http) = {
    get: "/{leaderboard_id}/list"
  };
}
}
message LeaderBoard {
repeated PlayerDetails scores = 1;
}

message PlayerDetails {
string player_id = 1;
string player_name = 2;
int32 player_score = 3;
}

message AddPlayer {
string leaderboard_id = 1 [(kalix.field).entity_key = true];
string player_id = 2;
string player_name = 3;
int32 player_score = 4;
}

message GetScores{
string leaderboard_id = 1 [(kalix.field).entity_key = true];
}
Here, we start by setting the correct protobuf syntax version, package name, the class that will be auto-generated after compilation, and the required modules.
Next, we create our service and name it LeaderboardDemo. In the descriptor, we set the event-sourcing entity’s details: its name, unique state storage name (entity_type), persistence state name, and the events that will be emitted. A class with the entity’s name will be auto-generated where we write our logic.
The rest of the code consists of:
- RPC commands that will be fired to add new players and fetch player scores for our leaderboard
- Their transcoded respective REST API endpoints
- The messages that represent entities that will be passed to the commands
Modifying the Domain protobuf Definitions
Create a new file called spelling_game_domain.proto and add the following code:
syntax = "proto3";

package spelling.game.domain;

option java_outer_classname = "SpellingGameDomain";

message LeaderBoardState {
repeated PlayerDetails scores = 1;
}

message PlayerDetails {
string player_id = 1;
string player_name = 2;
string player_score = 3;
}

message PlayerAdded {
PlayerDetails player = 1;
}
This consists of messages representing the data entities, the event-sourced entity state, and the event.
Run mvn compile from your terminal to compile the code.
Writing the Code for the Commands to Our Service
After the compilation, a class called GamingLeaderboardEntity in thesrc/main/java/spelling/game/api folder is generated. There are several modifications that need to be made to it.
First, replace the emptyState method body with the following code, which defines the default state of the event-sourcing entity:
return SpellingGameDomain.LeaderBoardState.getDefaultInstance();Next, modify the body of the newPlayer method by adding the following, which builds the message received and then emits the PlayerAdded event:
SpellingGameDomain.PlayerAdded playerAddedEvent =
SpellingGameDomain.PlayerAdded.newBuilder()
  .setPlayer(SpellingGameDomain.PlayerDetails.newBuilder()
    .setPlayerId(addCommand.getPlayerId())
    .setPlayerName(addCommand.getPlayerName())
    .setPlayerScore(addCommand.getPlayerScore())
    .build())
  .build();
return effects().emitEvent(playerAddedEvent).thenReply(__ ->
  Empty.getDefaultInstance());
For the fetchScores method, we retrieve all scores from the entity’s current state, convert them into API form, and then return the scores in an Effect. There is a helper method called convert, which helps with the domain to API conversion. Once the fetchScores method’s body is replaced and the helper method has been added, we get this snippet:
@Override
public Effect<SpellingGameApi.LeaderBoard> fetchScores(SpellingGameDomain.LeaderBoardState currentState, SpellingGameApi.GetScores getScores) {
  List<SpellingGameApi.PlayerDetails> apiScores = currentState.getScoresList().stream()
    .sorted()
    .map(this::convert)
    .collect(Collectors.toList());
  SpellingGameApi.LeaderBoard apiLeaderboard = SpellingGameApi.LeaderBoard.newBuilder()
    .addAllScores(apiScores).build();
return effects().reply(apiLeaderboard);
}

private SpellingGameApi.PlayerDetails convert(SpellingGameDomain.PlayerDetails playerDetails) {
return SpellingGameApi.PlayerDetails.newBuilder()
  .setPlayerId(playerDetails.getPlayerId())
  .setPlayerScore(playerDetails.getPlayerScore())
  .setPlayerName(playerDetails.getPlayerName())
  .build();
}
Next, we modify the playerAdded method. This method is used for persisting the entity’s changes to Kalix. It has four helper methods that aid in the API-to-domain and domain-to-API conversions for the correct handling of the states.
This is its final code after modifications:
@Override
public SpellingGameDomain.LeaderBoardState playerAdded(SpellingGameDomain.LeaderBoardState currentState, SpellingGameDomain.PlayerAdded playerAdded) {
Map<String, SpellingGameApi.PlayerDetails> playerDetailsMap = domainPlayerToMap(currentState);
SpellingGameDomain.PlayerDetails playerDetails = playerAdded.getPlayer();
SpellingGameApi.PlayerDetails createdPlayer = domainPlayerToApi(playerDetails);
playerDetailsMap.put(playerDetails.getPlayerId(), createdPlayer);
return mapPlayerToDomain(playerDetailsMap);
}
These are the helper methods for the playerAdded method:
private SpellingGameApi.PlayerDetails domainPlayerToApi(SpellingGameDomain.PlayerDetails playerDetails) {
return SpellingGameApi.PlayerDetails.newBuilder()
  .setPlayerId(playerDetails.getPlayerId())
  .setPlayerName(playerDetails.getPlayerName())
  .setPlayerScore(playerDetails.getPlayerScore())
  .build();
}

private Map<String, SpellingGameApi.PlayerDetails> domainPlayerToMap(SpellingGameDomain.LeaderBoardState leaderBoardState) {
return leaderBoardState.getScoresList().stream().collect(Collectors
  .toMap(SpellingGameDomain.PlayerDetails::getPlayerId, this::domainPlayerToApi));
}

private SpellingGameDomain.LeaderBoardState mapPlayerToDomain(Map<String, SpellingGameApi.PlayerDetails> playerDetailsMap) {
return SpellingGameDomain.LeaderBoardState.newBuilder()
  .addAllScores(playerDetailsMap.values().stream().map(this::apiPlayerToDomain).collect(Collectors.toList()))
  .build();
}

private SpellingGameDomain.PlayerDetails apiPlayerToDomain(SpellingGameApi.PlayerDetails playerDetails) {
return SpellingGameDomain.PlayerDetails.newBuilder()
  .setPlayerId(playerDetails.getPlayerId())
  .setPlayerName(playerDetails.getPlayerName())
  .setPlayerScore(playerDetails.getPlayerScore())
  .build();
}
Compile the code and deploy it using mvn compile and mvn deploy commands, respectively.
Note: To successfully carry out the deployment, remember to sign up for a free Kalix account.
Once the service is ready, run this command and try testing with the default UI rendered in your browser.
kalix service proxy <service-name> --grpcuiCreating the Consumer Spring Boot App
Initializing the App
First, go to Spring Initializr and create a Spring initializer. Add Spring Web and Thymeleaf as dependencies, then click the GENERATE button. Extract the contents of the Zip file that’s downloaded. Using your IDE, open the project and add these dependencies:
<!--JSON converter -->
<dependency>
<groupId>com.fasterxml.jackson.core</groupId>
<artifactId>jackson-databind</artifactId>
<version>2.13.0</version>
</dependency>

<!-- OkHttp client-->
<dependency>
<groupId>com.squareup.okhttp3</groupId>
<artifactId>okhttp</artifactId>
<version>4.9.1</version>
</dependency>

<!--json simple-->
<dependency>
<groupId>com.googlecode.json-simple</groupId>
<artifactId>json-simple</artifactId>
<version>1.1</version>
</dependency>
The first one is for Jackson JSON converter, the second is for OKHttp Client, and the last is for JSON decoding and encoding. Rebuild the Maven file and then create these Plain Old Java Object (POJO) files in a module called pojo(src/main/java/com/kalix/leaderboard/demo/pojo). These will come in handy for sending requests to our service and capturing its responses.
Player.java
package com.kalix.leaderboard.demo.pojo;

public class Player {
private String playerId;
private String leaderBoardId;
private String playerName;
private String playerScore;

public String getPlayerId() {
  return playerId;
}
public void setPlayerId(String playerId) {
  this.playerId = playerId;
}

public String getPlayerName() {
  return playerName;
}
public void setPlayerName(String playerName) {
  this.playerName = playerName;
}

public String getPlayerScore() {
  return playerScore;
}
public void setPlayerScore(String playerScore) {
  this.playerScore = playerScore;
}

public String getLeaderBoardId() {
  return leaderBoardId;
}
public void setLeaderBoardId(String leaderBoardId) {
  this.leaderBoardId = leaderBoardId;
}
}
PlayerScore.java
package com.kalix.leaderboard.demo.pojo;

import com.fasterxml.jackson.annotation.JsonInclude;
import com.fasterxml.jackson.annotation.JsonProperty;
import com.fasterxml.jackson.annotation.JsonPropertyOrder;

@JsonInclude(JsonInclude.Include.NON_NULL)
@JsonPropertyOrder({
"playerId",
"playerName",
"playerScore"
})
public class PlayerScore {
@JsonProperty("playerId")
private String playerId;
@JsonProperty("playerName")
private String playerName;
@JsonProperty("playerScore")
private String playerScore;

@JsonProperty("playerId")
public String getPlayerId() {
  return playerId;
}
@JsonProperty("playerId")
public void setPlayerId(String playerId) {
  this.playerId = playerId;
}

@JsonProperty("playerName")
public String getPlayerName() {
  return playerName;
}
@JsonProperty("playerName")
public void setPlayerName(String playerName) {
  this.playerName = playerName;
}

@JsonProperty("playerScore")
public String getPlayerScore() {
  return playerScore;
}
@JsonProperty("playerScore")
public void setPlayerScore(String playerScore) {
  this.playerScore = playerScore;
}
}
Scores.java
package com.kalix.leaderboard.demo.pojo;

import java.util.List;

import com.kalix.leaderboard.demo.pojo.PlayerScore;
import com.fasterxml.jackson.annotation.JsonInclude;
import com.fasterxml.jackson.annotation.JsonProperty;
import com.fasterxml.jackson.annotation.JsonPropertyOrder;

@JsonInclude(JsonInclude.Include.NON_NULL)
@JsonPropertyOrder({
"scores"
})
public class Scores {
@JsonProperty("scores")
private List<PlayerScore> scores = null;

@JsonProperty("scores")
public List<PlayerScore> getScores() {
  return scores;
}

@JsonProperty("scores")
public void setScores(List<PlayerScore> scores) {
  this.scores = scores;
}
}
Adding the Controller Code
Next, add a module called controller (src/main/java/com/kalix/leaderboard/demo/controller). This is where we write our controller code.
In the folder, create a file called ScoreController.java.
To add a new player, we invoke an endpoint, triggering code that adds the playerDetails object state to a form, which is then displayed.
Note: that the Player.java pojo file is used. We’ll create the HTML files later.
@GetMapping("/addScore")
public String showForm(Model model) {
Player newPlayer = new Player();
model.addAttribute("playerDetails", newPlayer);
return "addScore.html";
}
From the form’s action attribute, we invoice another endpoint for saving our data.
@PostMapping("/save")
public String saveDetails(@ModelAttribute("playerDetails") Player ourPlayerDetails) throws IOException {
OkHttpClient client = new OkHttpClient().newBuilder()
  .build();
String leaderBoardID = ourPlayerDetails.getLeaderBoardId();
String playerID = ourPlayerDetails.getPlayerId();
String playerName = ourPlayerDetails.getPlayerName();
String playerScore = ourPlayerDetails.getPlayerScore();

JSONObject jsonObject = new JSONObject();
jsonObject.put("player_id", playerID);
jsonObject.put("player_name", playerName);
jsonObject.put("player_score", playerScore);
String jsonData = String.valueOf(jsonObject);

MediaType mediaType = MediaType.parse("application/json");
RequestBody body = RequestBody.create(jsonData, mediaType);
Request request = new Request.Builder()
  .url("http://localhost:8080/player/" + leaderBoardID + "/add")
  .method("POST", body)
  .addHeader("Content-Type", "application/json")
  .build();
client.newCall(request).execute();
return "redirect:/leaderboard";
}
First, OKHttpClient is initialized. Next, we create a JSON object, as gPRC only allows raw JSON data. We set the media type to JSON and create a request body from the JSON object string. We convert the JSON object to a string because RequestBody.create does not accept JSON object data types as parameters.
We then set the required parameters for the request, such as headers and methods, using the Request class helper methods.
Finally, we execute the request and display the leaderboard page.
The code for displaying the leaderboard is simple. We create a list from the responses retrieved from the leaderboard URL. This list is then passed to our model, which we fire to our leaderboard HTML file:
@GetMapping("/leaderboard")
public String showScores(Model model) {
RestTemplate restTemplate = new RestTemplate();
//the leaderboard id to be changed dynamically in your code
Scores responseList = restTemplate.getForObject("http://localhost:8080/<leaderboard_id>/list", Scores.class);
model.addAttribute("scoreList", responseList.getScores());
return "leaderboard.html";
}
Adding the UI Files
In the templates (src/main/resources/templates) folder, create the following HTML files that will add and retrieve the score data. We used Bootstrap for styling, but you can use any styling framework.
Form (addScore.html)
<!DOCTYPE html>
<html xmlns:th="https://thymeleaf.org">
<head>
  <meta charset="UTF-8">
  <link rel="stylesheet" href="https://cdn.jsdelivr.net/npm/bootstrap@4.0.0/dist/css/bootstrap.min.css" integrity="sha384-Gn5384xqQ1aoWXA+058RXPxPg6fy4IWvTNh0E263XmFcJlSAwiGgFAW/dAiS6JXm" crossorigin="anonymous">
  <title>Spring Kalix Leaderboard</title>
</head>
<body>
  <div class="d-flex justify-content-center">
    <div class="border-dark border-secondary card" style=" margin-top: 5%; min-width: 40%">
      <div class="card-header text-center">
        Add Player and Score
      </div>
      <form th:action="@{/save}" method="post" th:object="${playerDetails}">
        <div class="form-group" style="margin-left: 10%; margin-top: 5%; margin-right: 10%">
          <input type="text" class="form-control" th:field="*{leaderBoardId}" placeholder="Leaderboard ID">
        </div>
        <div class="form-group" style="margin-left: 10%; margin-right: 10%">
          <input type="text" class="form-control" th:field="*{playerId}" placeholder="Player ID">
        </div>
        <div class="form-group" style="margin-left: 10%; margin-right: 10%">
          <input type="text" class="form-control" th:field="*{playerName}" placeholder="Player Name">
        </div>
        <div class="form-group" style="margin-left: 10%; margin-right: 10%">
          <input type="text" class="form-control" th:field="*{playerScore}" placeholder="Player Score">
        </div>
        <div class="form-group" style="margin-left: 10%; margin-right: 10%">
          <button type="submit" class="btn btn-danger">Submit</button>
        </div>
      </form>
    </div>
  </div>
</body>
</html>
Leaderboard (leaderboard.html)
<!DOCTYPE html>
<html xmlns:th="https://thymeleaf.org">
<head>
  <meta charset="UTF-8">
  <link rel="stylesheet" href="https://cdn.jsdelivr.net/npm/bootstrap@4.0.0/dist/css/bootstrap.min.css" integrity="sha384-Gn5384xqQ1aoWXA+058RXPxPg6fy4IWvTNh0E263XmFcJlSAwiGgFAW/dAiS6JXm" crossorigin="anonymous">
  <title>Spring Kalix Leaderboard</title>
</head>
<body>
  <div class="d-flex justify-content-center">
    <div class="card" style="width: 18rem; margin-top: 5%; max-width: 40%">
      <div class="card-header text-center">
          Leaderboard
      </div>
      <table class="table table-striped">
        <thead>
        <tr>
          <th class="text-danger">Player</th>
          <th class="text-danger">Score</th>
        </tr>
        </thead>
        <tbody>
        <tr th:each="score : ${scoreList}">
          <td th:text="${score.getPlayerName()}"></td>
          <td th:text="${score.getPlayerScore()}"></td>
        </tr>
        </tbody>
      </table>
    </div>
  </div>
</body>
</html>
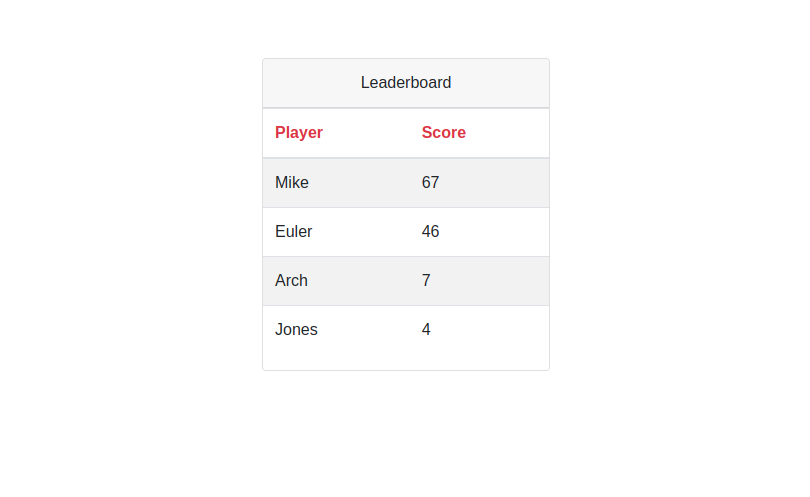
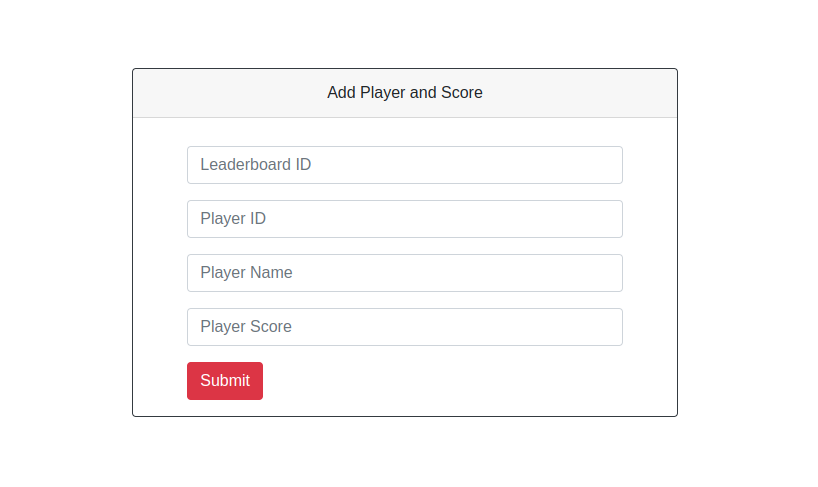
To display the form, go to localhost:8085/addScore. For the leaderboard, go to localhost:8085/leaderboard.
The leaderboard and the form appear as follows:
This has been a quick overview of how you can use Kalix services to build an app. There is a lot more to explore. To go deeper, take a look at the Kalix documentation.