
Introduction
Modern software systems rely on microservices to handle complex tasks. Microservices usually perform small, well-defined tasks. It’s generally simpler to develop individual microservices than to maintain the monolith, given their smaller size. However, combining multiple microservices to handle complex business logic is challenging.
One of the main reasons it’s challenging is that, typically, microservices use different data storage methods. Maintaining the application’s state is very difficult — especially when scaling the app to thousands or millions of users.
Kalix is a developer platform that works to solve these issues by providing low latency stateful APIs and services. With Kalix, we don’t need to maintain our databases or provision the servers. Kalix provides an in-memory state that reduces latency.
When developing microservices with Kalix, we focus on the API. We create data objects and specify services using language and platform-neutral protocol buffers (called a protobuf). Kalix then generates the API using JavaScript, TypeScript, Scala, or Java-based, depending on our definition.
Also, Kalix enables us to use production battle-tested microservice architecture patterns, including Event Sourcing, Command and Query Responsibility Segregation (CQRS), and conflict-free replicated data types (CRDTs), without having to learn how to implement them ourselves.
In this tutorial, we’ll build and deploy a microservice to Kalix. The service stores geolocations and groups them by the user identifier. We’ll expose this data through HTTP endpoints and consume them in the Spring Boot MVC Java application. The latter enables users to type their geolocations. The app also exposes the endpoint to receive weather alerts from an external system. Finally, we’ll show how the Java app can message users in proximity about weather conditions using a hypothetical third-party notification service.
To follow along with this tutorial, you need:
- Kalix account
- Kalix CLI
- Docker Desktop with Docker Hub access
- Heroku account
The development pipeline has two parts. First, we’ll create the geolocation API and deploy it to Kalix. Then, we’ll implement the Java app and deploy it to Heroku.
You can find the companion code here:
Creating the Geolocation API
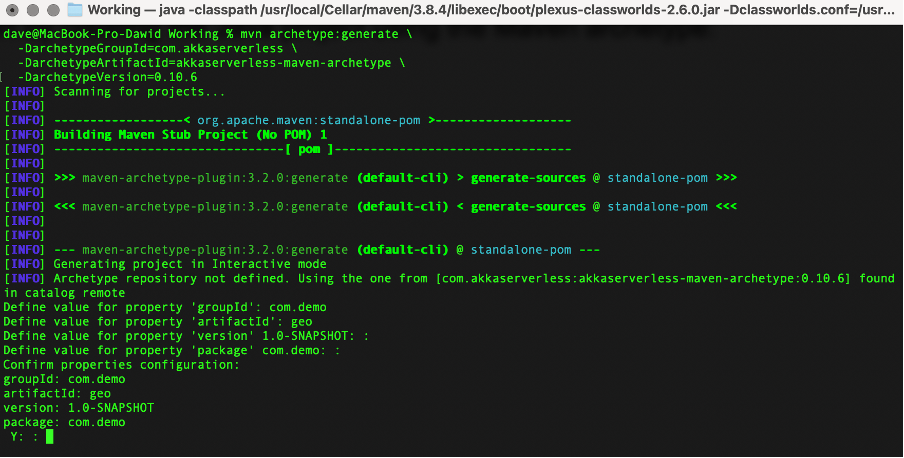
We start by creating the Java project using the Maven archetypes:
mvn archetype:generate
-DarchetypeGroupId=com.kalix
-DarchetypeArtifactId=kalix-maven-archetype
-DarchetypeVersion=1.0.2
Then, we provide the following values (see the screenshot below):
groupId: com.demoartifactId: geoversion: 1.0-SNAPSHOTpackage: com.demoY: press Enter
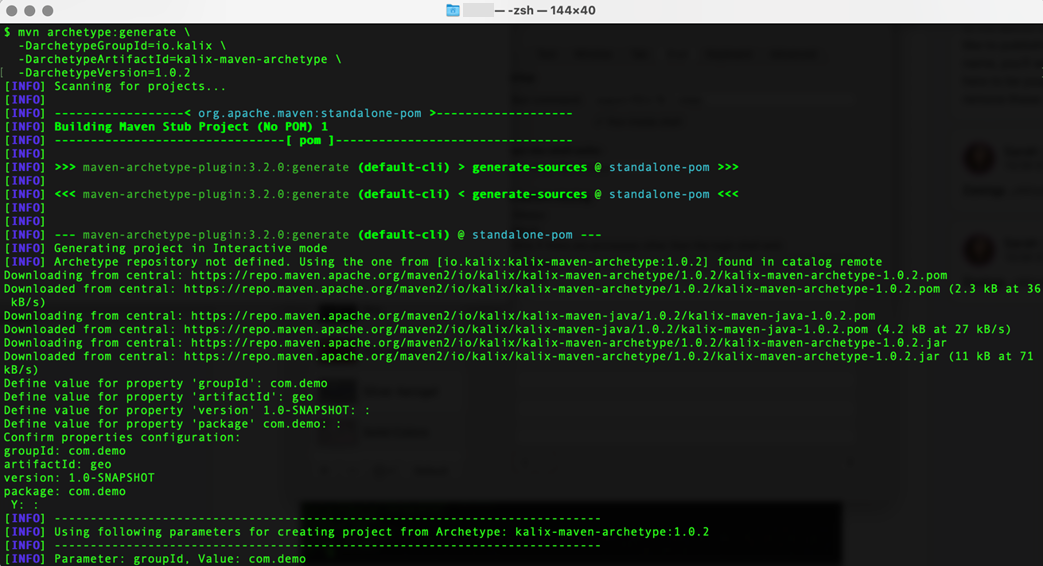
Kalix generates the project in the geo folder. Open it in the code editor of your choice.
Our project contains an example definition of the sample Counter service: src/main/proto/com/demo/counter_api.proto.
The service uses four calls:
IncreaseDecreaseResetGetCurrentCounter
These represent operations we can invoke to change the state of the service. In this example, the state is defined as the CounterState message in the src/main/proto/com/demo/domain/counter_domain.proto file:
message CounterState {
int32 value = 1;
}
All this reflects the fact that, in domain-driven design (DDD) modeling, the domain should be responsible for updating the service’s state.
The counter_api.proto file also declares several messages exchanged between clients and the service, like the IncreaseValue message:
message IncreaseValue {
string counter_id = 1 [(kalix.field).entity_key = true];
int32 value = 2;
}
There are two fields: counter_id and value. The first one is annotated with the kalix.field to inform the code generation tool that counter_idis the entity key. The other one represents the counter value.
This sample service gives us an idea of how to implement our own geolocation service. We need to create a service, which stores users’ geolocations and exposes them through HTTP calls. We start by supplementing the src/main/proto/com/demo folder with the geo_api.proto file, where we define the service:
service GeolocationService {
option (kalix.codegen) = {
  value_entity: {
    name: "com.demo.domain.GeolocationEntity"
    entity_type: "geolocation"
    state: "com.demo.domain.GeolocationState"
  }
};

rpc AddItem(AddGeolocationItem) returns (google.protobuf.Empty) {
  option (google.api.http) = {
    post: "/geo/{user_id}/items/add"
    body: "*"
  };
}

rpc GetAll(GetGeolocations) returns (Geolocations) {
  option (google.api.http) = {
    get: "/geo/{user_id}"
    additional_bindings: {
      get: "/geo/{user_id}/items"
      response_body: "items"
    }
  };
}
}
The service contains two calls: AddItem and GetAll. The first one enables users to add geolocations. The second one lets us retrieve all geolocations added by the specific user. Importantly, the remote procedure calls (RPC) include additional HTTP transcoding, which converts protocol buffers to JSON.
Next, we need to supplement the header of the geo_api.proto file with the following statements:
syntax = "proto3";

package com.demo;

option java_outer_classname = "GeoApi";

import "kalix/annotations.proto";
import "google/api/annotations.proto";
import "google/protobuf/empty.proto";
Then, we define four messages: Geolocations, Geolocation, AddGeolocationItem, and GetGeolocations. Make sure to paste the following code above the service definition in the geo_api.proto file:
message Geolocations {
repeated Geolocation items = 1;
}

message Geolocation {
double lat = 1;
double long = 2;
}

message AddGeolocationItem {
int32 user_id = 1 [(kalix.field).entity_key = true];
double lat = 2;
double long = 3;
}

message GetGeolocations {
int32 user_id = 1 [(kalix.field).entity_key = true];
}
Now, we must define the new state for the service, as detailed in the geo_domain.proto in the src/main/proto/com/demo/domain folder. The file should read as follows:
syntax = "proto3";

package com.demo.domain;

option java_outer_classname = "GeolocationDomain";

message Geolocation {
int32 user_id = 1;
double lat = 2;
double long = 3;
}

message GeolocationState {
repeated Geolocation items = 1;
}
Here, we add the user_id in Geolocation.
Then, we generate the Java classes based on the above protocol definitions by running the following command in the geo folder:
mvn compileThe sample output of this command looks as follows:
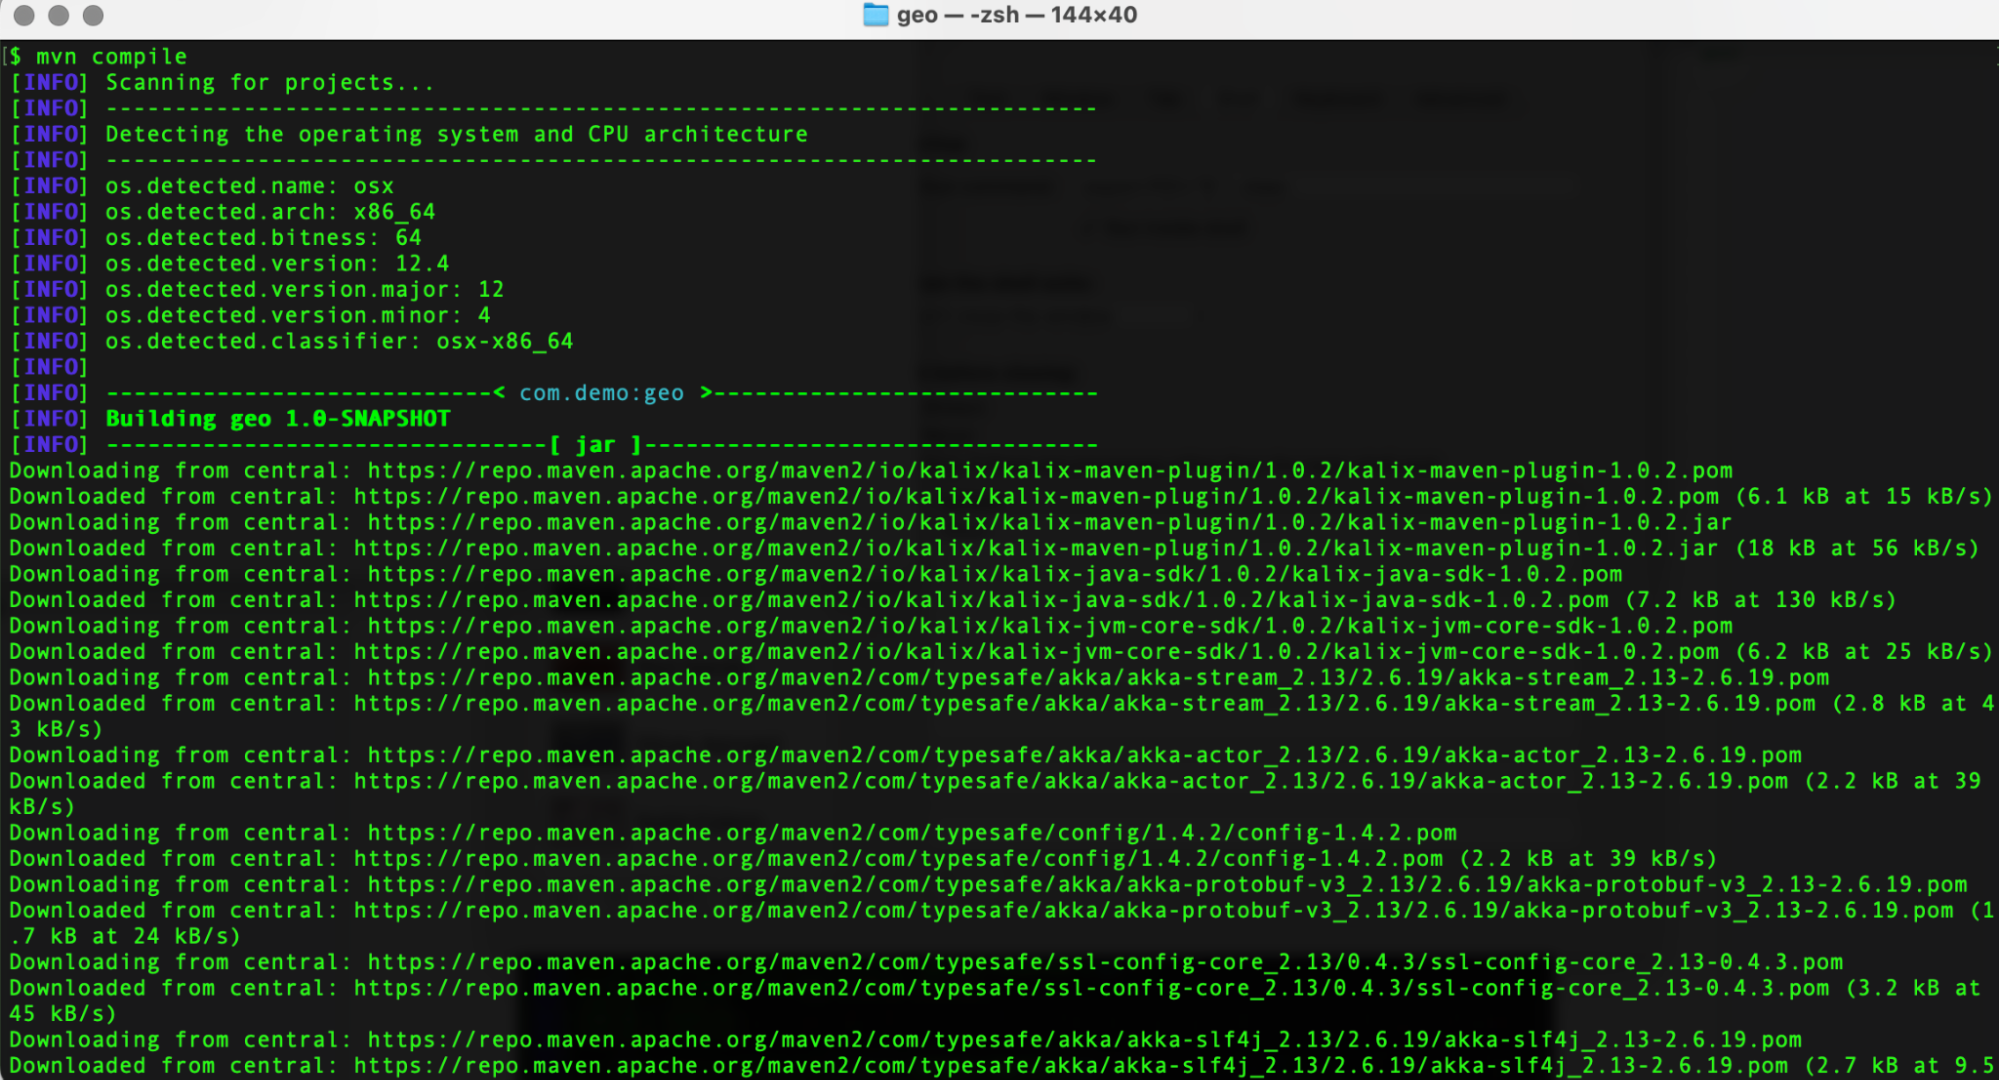
Note that the tool generated a lot of Java files. The most important one is src/main/java/com/demo/domain/GeolocationEntity.java.
Now we need to implement the command handlers. Let’s start with the emptyState:
package com.demo.domain;

import java.util.Comparator;
import java.util.List;
import java.util.Map;
import java.util.Optional;
import java.util.function.Predicate;
import java.util.stream.Collectors;

import com.kalix.javasdk.valueentity.ValueEntityContext;
import com.demo.GeoApi;
import com.google.protobuf.Empty;

@Override
public GeolocationDomain.GeolocationState emptyState() {
return GeolocationDomain.GeolocationState.getDefaultInstance();
}
The method returns a default instance of the GeolocationState.
Now, let’s implement the getAll method:
@Override
public Effect<GeoApi.Geolocations> getAll(GeolocationDomain.GeolocationState currentState, GeoApi.GetGeolocations getGeolocations) {
List<GeoApi.Geolocation> items = currentState.getItemsList().stream()
  .map(this::convert)
  .collect(Collectors.toList());

GeoApi.Geolocations geolocations =
  GeoApi.Geolocations.newBuilder().addAllItems(items).build();

return effects().reply(geolocations);
}

private GeoApi.Geolocation convert(GeolocationDomain.Geolocation item) {
return GeoApi.Geolocation.newBuilder()
  .setLat(item.getLat())
  .setLong(item.getLong())
  .build();
}
The helper method, convert, is used here to convert between the domain and API models. The method getAll returns the list of geolocations wrapped in the Effect class from Kalix.
@Override
public Effect<Empty> addItem(
GeolocationDomain.GeolocationState currentState,
GeoApi.AddGeolocationItem addGeolocationItem) {
  Map<Integer, GeoApi.Geolocation> state = domainStateToMap(currentState);

  GeoApi.Geolocation newItem = domainItemToApi(addGeolocationItem);

  state.put(addGeolocationItem.getUserId(), newItem);

  return effects().updateState(newState).thenReply(Empty.getDefaultInstance());
}

private Map<Integer, GeoApi.Geolocation> domainStateToMap(
GeolocationDomain.GeolocationState state) {
return state.getItemsList().stream().
  collect(Collectors.toMap(GeolocationDomain.Geolocation::getUserId,
    this::apiItemToDomain));
}

private GeoApi.Geolocation apiItemToDomain(
GeolocationDomain.Geolocation item) {
return GeoApi.Geolocation.newBuilder()
  .setLat(item.getLat())
  .setLong(item.getLong())
  .build();
}

private GeoApi.Geolocation domainItemToApi(
GeoApi.AddGeolocationItem item) {
return GeoApi.Geolocation.newBuilder()
  .setLat(item.getLat())
  .setLong(item.getLong())
  .build();
}
Again, the helper methods (domainStateToMap, apiItemToDomain, domainItemToApi) are employed to convert between the domain and API models.
We can now recompile the service to make sure there are no syntax errors:
mvn compileDeploying the Service to Kalix
After implementing the service, we must deploy it. The deployment is based on the Docker containers. So, we must create the repository in the Docker registry (Docker Hub for example), and authorize our Docker CLI (docker login). Then, we must update our pom.xml with the repository name:
<!-- TODO Update to your own Docker repository or Docker Hub scope -->
<dockerImage>YOUR_REPOSITORY_GOES_HERE </dockerImage>
<dockerTag>${project.version}</dockerTag>
Before deploying the service, we must create the project (make sure you authenticated using kalix auth login):
kalix projects new weather-alerting "Weather alerting" --region aws-eu-central-1You can see the regions available to you if you omit the --region parameter. The output of this command appears below:

Afterward, we deploy the service as follows (the output looks as shown below):
mvn deploy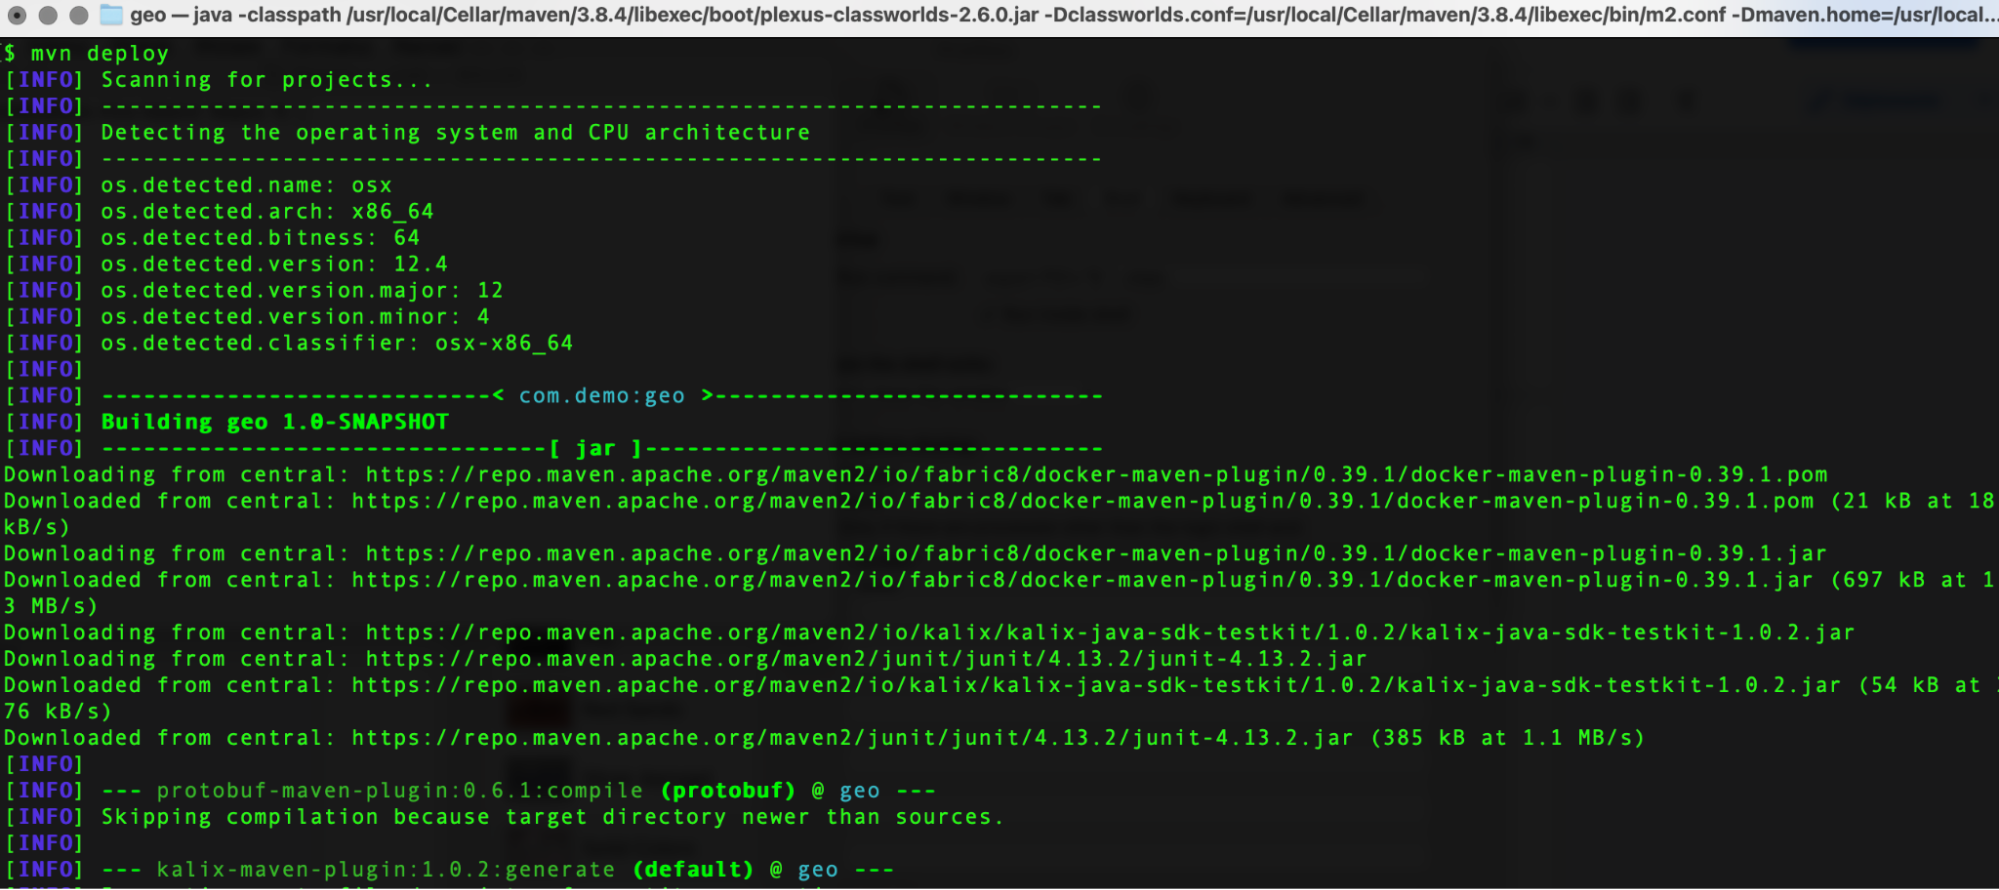
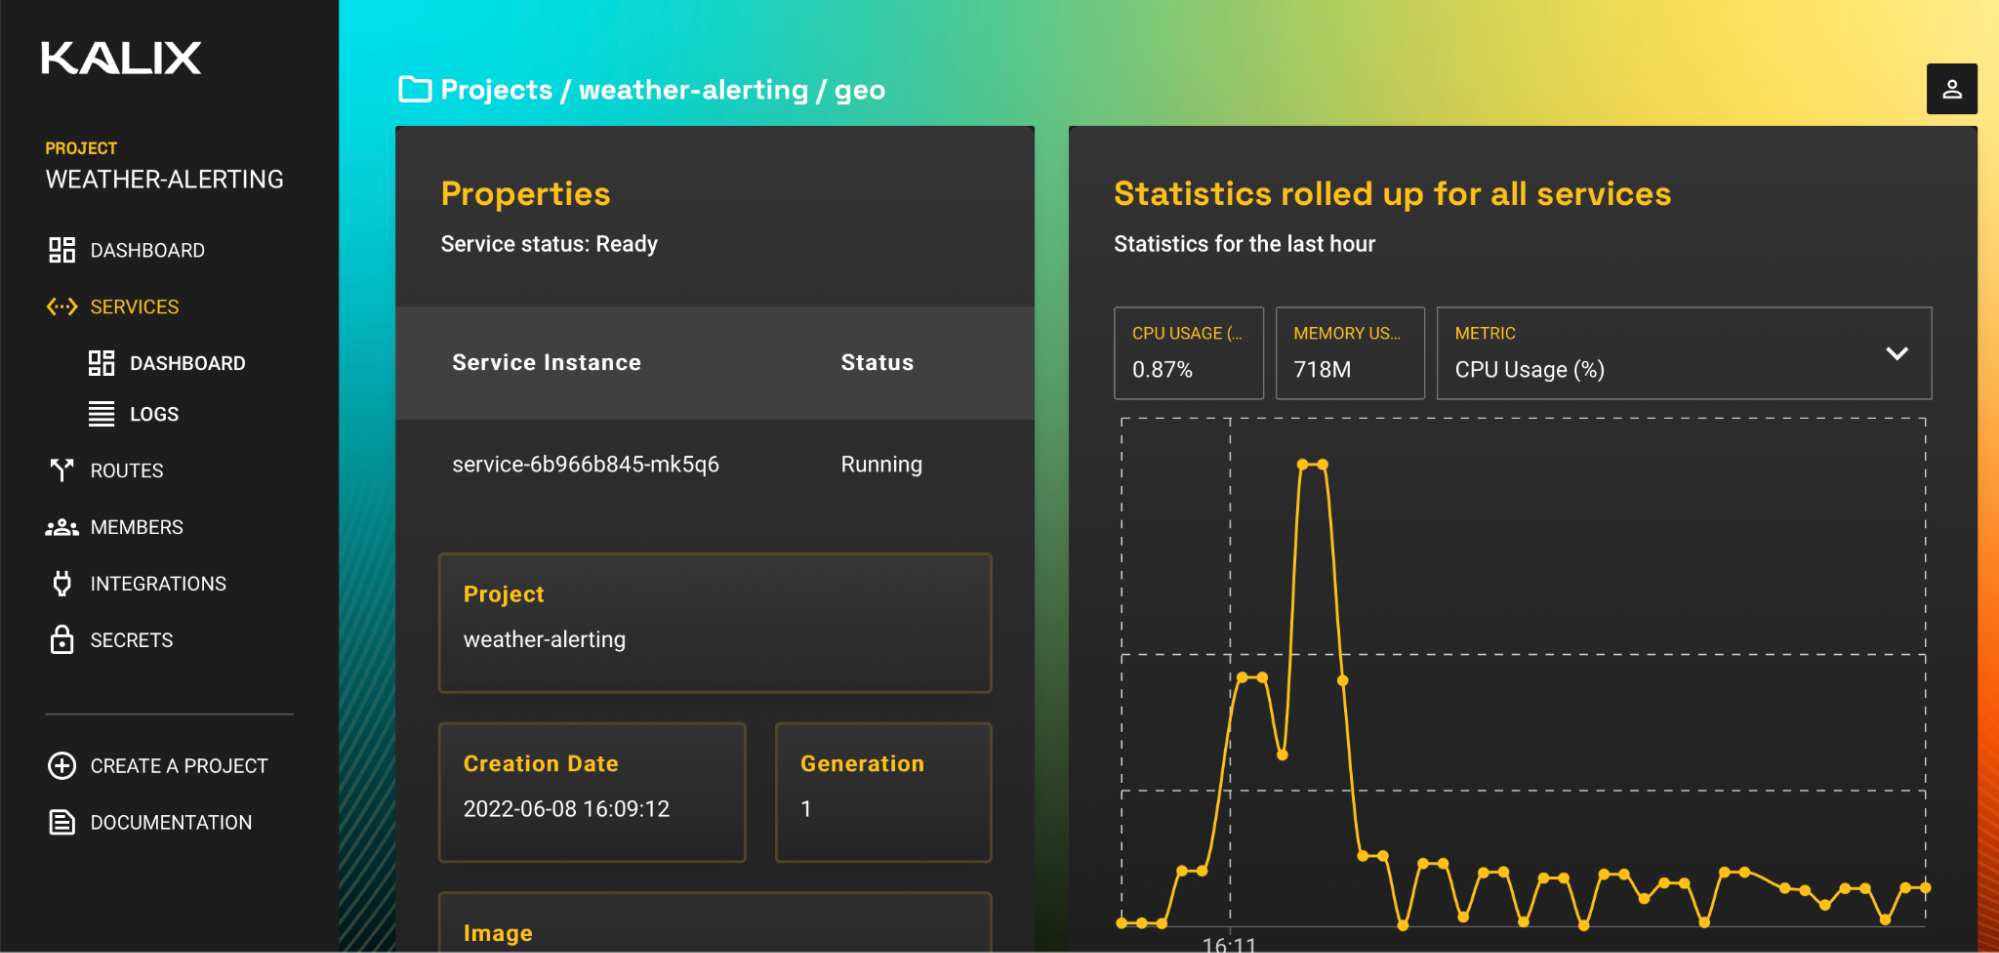
To check the service status, use the following command. Note that you might need to wait a few minutes before the service changes its state to Ready. You can invoke the following command to check the service’s status.
kalix services listThen, we expose the service to the Internet using the following command:
kalix services expose geo
You can also use the Kalix portal to check service
Consuming the Service in the Web Application
We can now implement the web application, which uses the geolocation API. You can find the complete source code here.
The application was created using the Spring Boot MVC with the following dependencies (see pom.xml):
spring-boot-starter-thymeleafspring-boot-starter-webspring-boot-starter-data-restspring-boot-starter-testjavax.validation.validation-api
These are the standard dependencies you add for view rendering (thymeleaf) and building MVC apps (web, data-rest, test, and validation-api).
Then, we create the model, representing geolocations:
public class Geolocation {
@JsonProperty("userId")
public int getUserId() {
    return this.userId;
}

public void setUserId(int userId)
{
    this.userId = userId;
}
int userId;

@JsonProperty("lat")
public Double getLat() {
    return this.lat;
}

public void setLat(Double lat) {
    this.lat = lat;
}
@NotNull
Double lat;

@JsonProperty("long")
public Double getLng() {
    return this.lng;
}

public void setLng(Double lng) {
    this.lng = lng;
}
@NotNull
Double lng;
}
The above model is used for submitting the data and also for sending geolocations to the geolocation API service, which we already deployed to Kalix.
Now, we need to create two views using the Thymleaf rendering engine. We save both views in the resources/templates folder.
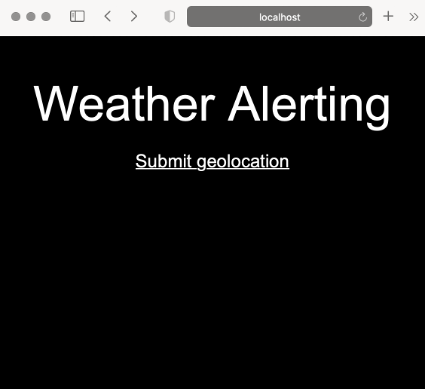
The first view, index.html renders the welcome view with one hyperlink to the submit page.
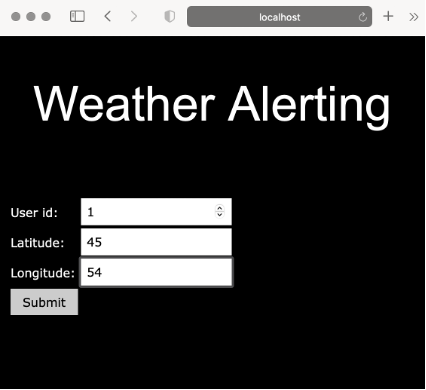
The second view, submit.html contains the form, enabling the user to submit their geolocation:
<form class="w3-container w3-padding-32" action="#" th:action="@{/handleSubmit}" th:object="${geolocation}" method="post">
<table>
  <tr>
    <td>User id:</td>
    <td><input type="number" class="w3-input" placeholder="userId" th:field="*{userId}"/></td>
    <td class="w3-text-red" th:if="${#fields.hasErrors('userId')}" th:errors="*{userId}"></td>
  </tr>
  <tr>
    <td>Latitude:</td>
    <td><input type="text" class="w3-input" placeholder="Lat" th:field="*{lat}" /></td>
    <td class="w3-text-red" th:if="${#fields.hasErrors('lat')}" th:errors="*{lat}"></td>
  </tr>
  <tr>
    <td>Longitude:</td>
    <td><input type="text" class="w3-input" placeholder="Lng" th:field="*{lng}" /></td>
    <td class="w3-text-red" th:if="${#fields.hasErrors('lng')}" th:errors="*{lng}"></td>
  </tr>
  <tr>
    <td><button class="w3-button w3-black" type="submit">Submit</button></td>
  </tr>
</table>
</form>
Then, in the application.properties file, we define two constants: the HTTP endpoint of the geolocation service, and the application port, which is set to 80.
kalix.endpoint = https://<your_subdomain>.kalix.app/geo/
server.port = 80
We can now implement the new controller, WeatherAlertingController. To this end, we create the new file, WeatherAlertingController.java, which handles business logic. We start by adding the two methods that return our views:
@Controller
public class WeatherAlertingController {
@GetMapping("/")
public String index() {
  return "index";
}

@GetMapping("/submit")
public String submit(Geolocation geolocation) {
  return "submit";
}

// Other members
}
Then, to handle REST API calls, we use the standard RestTemplate class. In the WeatherAlertingController we add the private member and the constructor, which instantiates the RestTemplate class instance through the dependency injection:
private final RestTemplate restTemplate;

public WeatherAlertingController(RestTemplateBuilder restTemplateBuilder) {
this.restTemplate = restTemplateBuilder.build();
}
After, we implement the handleSubmit method, which is invoked whenever a user submits his or her geolocation. We use this method to send the geolocation to the geolocation API within the Kalix platform:
@Value("${kalix.endpoint}")
private String endpoint;

@PostMapping("/handleSubmit")
public String handleSubmit(@Valid Geolocation geolocation, BindingResult bindingResult) {

String url = endpoint + geolocation.getUserId() + "/items/add";

this.restTemplate.postForObject(url, geolocation, Geolocation.class);

return "index";
}
Note that to create the request URL, we use the endpoint from theapplication.properties file.
Finally, we add another method, which can be called by an external service to check whether the user is within the specified geolocation, and then send them a notification through a hypothetical third-party service:
@RequestMapping(value = "/notify", method = RequestMethod.GET)
@ResponseBody
public String handleExternalNotification(
@RequestParam(value = "lat", required = true) Double lat,
@RequestParam(value = "long", required = true) Double lng,
@RequestParam(value = "userId", required = true) Integer userId) {
  String url = endpoint + "{userId}/items";

  // Get all items
  ResponseEntity<Geolocation[]> response = this.restTemplate.getForEntity(
    url, Geolocation[].class);

  Geolocation[] items = response.getBody();

  // TODO: Check if current item exists in the list, if so send notification

  return "OK";
}
We can now build the application and check it locally:
mvn clean install
mvn spring-boot:run
The app should look as follows:

Deployment to Heroku
Finally, we deploy the app to the Heroku cloud using the Heroku CLI and Git. So, start by logging into Heroku cloud:
heroku loginNext, create the Proc file. Heroku uses this file to start the application.
echo "web: java $JAVA_OPTS -jar target/weather-demo-0.0.1-SNAPSHOT.jar" >> ProcfileUpdate the application.properties file to configure port mapping.
server.port = ${PORT:8080}In the next step, create the application on Heroku.
heroku createThen, add changes, and deploy the app.
git add
git push heroku main
Add the following command:
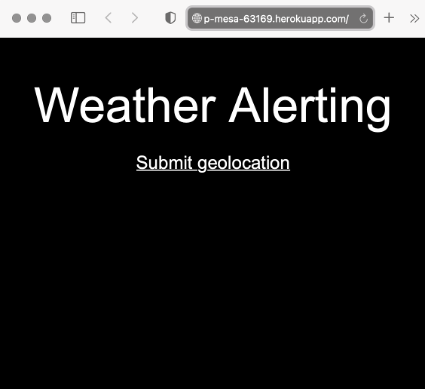
heroku openYou should see your application is working in the Heroku cloud.

Summary
In this tutorial, we explored how to create an API with Kalix from the beginning. We saw how to use protocol buffers to specify API declarations and how Kalix developer tools generate Java code. Then, we reviewed how to deploy the service to Kalix and consume it with the Spring MVC application. As a bonus, we deployed the Java app to the Heroku cloud.
Now that you’ve seen Kalix in action, get started with Kalix for free.